This guide cuts through the complexity of Velux loft conversion. We will give you a clear view of the costs, benefits, and steps required to enhance your home with Velux windows. Whether you’re curious about planning permissions or seeking an effective way to add value to your property, we cover what you need to get started.
Understanding Velux Loft Conversions
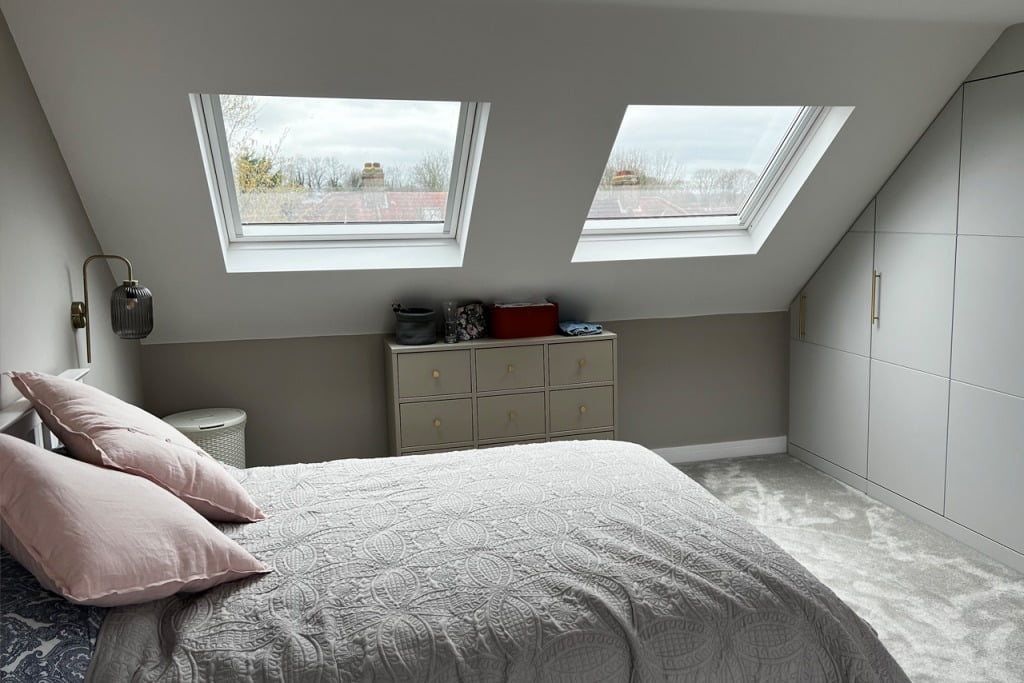
A Velux loft conversion is a unique type of loft conversion characterized by installing roof windows into the existing roof plane. This transformation creates a habitable area within the existing roof structure, making it an attractive solution for many homeowners looking for a cost-effective way to expand their living space. Compared to other types of loft conversions, like the dormer and mansard loft conversion, Velux conversions are more straightforward, making them a popular choice for home renovations.
What sets Velux conversions apart from other loft conversions is using Velux roof windows. Named after the brand that manufactures the skylights, these windows invite ample natural light into the loft space, enhancing the ambience and overall livability of the room.
What is a Velux Loft Conversion?

A Velux loft conversion is recognized by its minimal disruption to the existing roof structure. This means that the roofline remains unchanged during the building renovation process, making it a less intrusive option compared to other loft conversion designs like the dormer loft conversion or mansard loft conversion.
At the heart of this type of conversion are the Velux branded skylights or roof windows. These windows offer several benefits:
- They invite ample natural light into the loft space
- They add a unique aesthetic appeal to the room
- Their installation is generally more straightforward and cost-effective due to less construction work involved
These factors make Velux skylights or roof windows the go-to option for many homeowners.
Benefits of Velux Loft Conversions
Velux loft conversions offer several unique benefits. Firstly, they are considered non-intrusive and more affordable compared to other types of loft conversions. This is largely due to the fact that they often require less structural modification, making them a cost-effective solution for many homeowners.
Another crucial advantage of Velux conversions is the improvements in natural lighting and ventilation they provide. Some benefits include:
- Increased natural light reduces the need for artificial lighting
- Enhanced ventilation improves air quality, making the space more comfortable to live in
- Energy-saving potential, such as reducing heating bills by at least 20% with energy-efficient Velux windows
These conversions are both a practical and sustainable choice for homeowners, helping them avoid horrible electric bills whilst maintaining a comfortable living environment.
Assessing Your Roof’s Suitability

Before jumping on a Velux loft conversion, it is essential to assess your roof’s suitability for such a conversion. This evaluation involves considering several factors such as the pitch and structure of your existing roof, as well as the available space within your loft.
It’s advisable to consult a qualified builder or loft conversion specialist to ensure your home complies with the necessary regulations and is suitable for a Velux conversion. Our assessment can save you from potential complications and unforeseen costs down the line.
Roof Pitch and Structure
The angle of your roof pitch is a key determinant in the feasibility of a loft conversion. This angle influences the potential for available living space within your loft. A roof with a steeper pitch not only offers more space but can better accommodate a Velux loft conversion by providing adequate headroom and usable space.
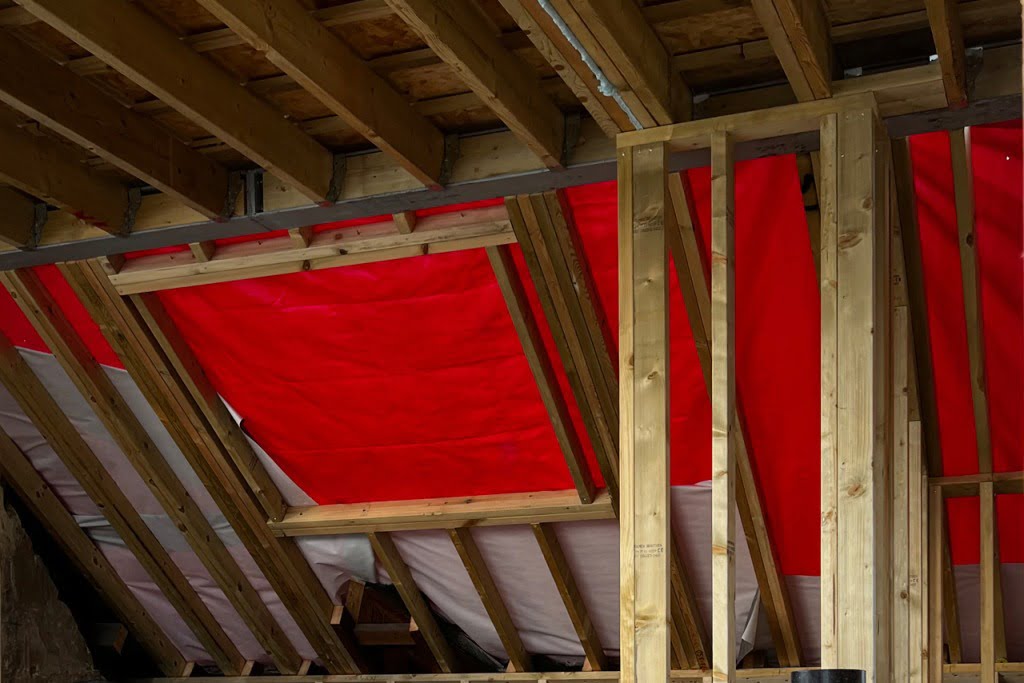
Furthermore, ensuring the roof’s structural integrity is vital before you install roof windows, such as new Velux windows. Some roofs may even require additional reinforcement to support the conversion. Ideally, roof pitches between 35 and 53 degrees are optimal for Velux window installation, accommodating various roof materials like tile and slate.
VELUX has introduced an innovative design for Low Pitch Roof Windows, ideally suited for roof pitches between 10 and 20 degrees. Previously, installing windows on low-pitch roofs posed a challenge, typically requiring specialist roofers to construct a higher pitch to accommodate the window installation.
Available Space
Beyond the roof’s pitch and structure, the available space within the loft is another crucial factor to consider. The loft’s floor space must be assessed to ensure it is adequate in size to create a usable room post-conversion.
For a Velux loft conversion, it’s critical to consider whether there is enough head height in the loft space, including additional space needed for installing a staircase. Existing obstacles within the loft, such as water tanks and chimney stacks, will need to be removed or worked into the conversion design to maximize space utilization.
Velux Window Options
With a basic understanding of Velux loft conversions, let’s dive into the diverse range of Velux window options available. These windows come in various types, including centre pivot, top-hung, and balcony styles. Depending on your preferences and architectural design, you can choose from options like Cabrio balcony windows and conservation roof windows.
Velux windows are designed with functionality in mind. They provide increased daylight and ventilation, adding to the overall comfort and livability of the room beneath. To seamlessly blend with the home’s exterior, Velux windows can be integrated into the roof with the use of existing tiles or slates, ensuring that they complement the aesthetic of the roof while providing functional benefits.
Centre Pivot Roof Windows

Centre pivot roof windows offer several benefits. They can enhance air quality and control humidity by allowing fresh air into the property through a ventilation flap, even when the window is closed.
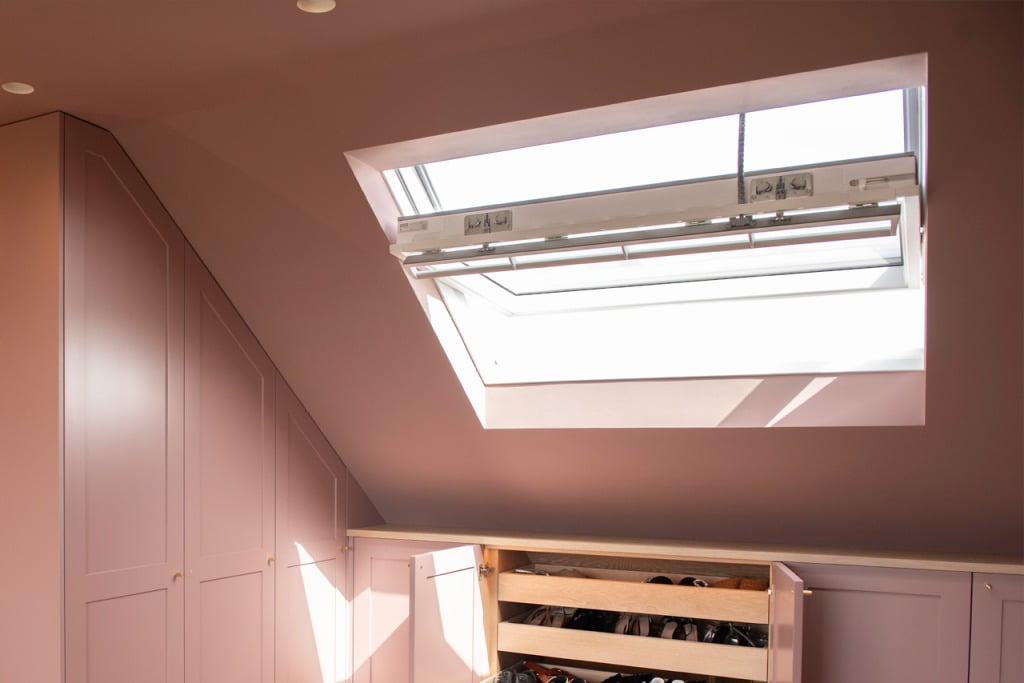
A key feature of centre pivot roof windows like the Velux GGL is the inclusion of a ventilation flap that promotes continuous airflow. For ease of cleaning and maintenance, these windows can rotate 180 degrees and lock in place, providing straightforward access to the window glass.
Top Hung Roof Windows
Top-hung roof windows offer a unique advantage – they open entirely outwards, ensuring panoramic views that are perfect for installations at eye level, making them such a window to consider for your home.
Designed with safety in mind, some top-hung Velux windows can be fully opened, serving as escape windows during emergencies. This feature not only enhances the functionality of your loft space but also ensures it adheres to safety standards.
Cabrio Balcony Windows
Velux Cabrio balcony windows offer a unique blend of utility and aesthetic appeal. These windows are designed to transform from a roof window to a balcony, adding a modern aesthetic to loft conversions.
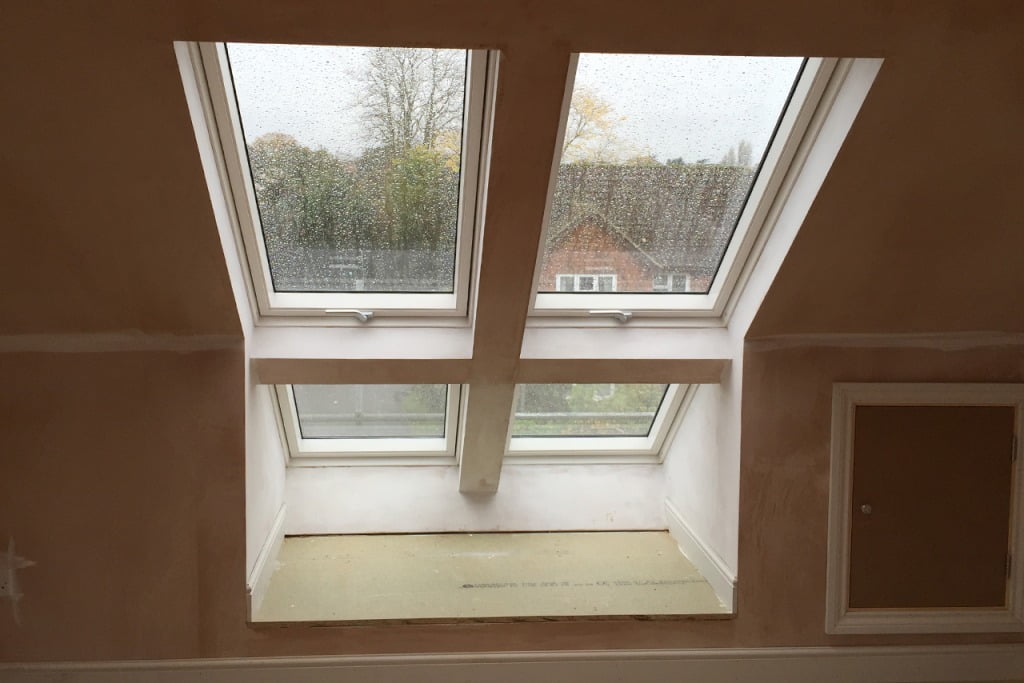
The top section operates as a top-hung roof window, and the lower section unfolds into balcony side railings and a sturdy floor. This unique functionality offers ease of cleaning and a boost in property value. Cabrio balcony windows come in single, double, and triple variations with two-width options for each, and customers can choose between natural pine or a white-painted interior finish.
Planning Permission and Building Regulations
While Velux loft conversions provide a straightforward and cost-effective way to create extra space in your home, it’s important to understand the requirements for planning permission and compliance with building regulations. These regulations ensure the safety and quality of the conversion, and adhering to them is crucial for the viability of your project.
Planning permission for Velux windows may be influenced by:
- Location and property type, including size, placement rules, and whether the property is in a conservation area
- Conditions for installing Velux windows as permitted development only apply to houses and do not extend to flats, maisonettes, or houses already converted into other buildings
- These conditions do not apply to non-residential properties.
Planning Permission Requirements
In general, Velux loft conversions do not require planning permission as they often fall within permitted development rights. However, planning permission may be necessary if the Velux conversion is in a conservation area or a listed building, or if there are significant structural alterations like raising the roof.
It’s important to note that certain Velux window installations, such as Cabrio balcony windows, may require planning permission as they can represent a transition from a window to a balcony, which is not typically covered under permitted development rights. The planning application process generally takes around 8 weeks to receive a decision from the planners.
Building Regulations Compliance
Compliance with planning and building regulations, as well as building control, is a critical step in any loft conversion process. For a Velux loft conversion, these regulations encompass:
- Loft floor strengthening
- Structural stability
- Fire escape routes
- Stair design
- Insulation for energy efficiency
- Sound insulation
- Ventilation
- Safety glazing
A minimum height of 2.2 meters between the floor joists and the ridge timber is required for the ceiling height and staircase headroom compliance. Additionally, the process of inserting a roof window is classified as a material alteration under building regulations, which addresses:
- Structural stability
- Fire safety
- Health and safety
- Energy efficiency
Cost and Timeline of a Velux Loft Conversion
Understanding the cost and timeline of a Velux loft conversion is crucial in setting realistic expectations for your project. The cost of a Velux loft conversion varies based on the size and complexity of the project, with a small Velux loft conversion typically costing between £15,000 and £20,000, while a large conversion can start from £30,000 and exceed £45,000.
As for the timeline, completing a Velux loft conversion generally takes less time than other loft conversions. The average duration for a Velux loft conversion is between 8 to 12 weeks, making it a time-efficient option for those looking to expand their living space without significant disruption.
Cost Factors
The cost of a Velux loft conversion is influenced by several factors, such as the size of the conversion, the materials used, and its complexity. Traditional cut rafters are often preferable for Velux conversions as they typically require fewer structural alterations, reducing overall costs in comparison to pre-formed trusses.
The level of design and finish, from basic to high-end luxury, can significantly affect the overall expenses involved in a Velux loft conversion. Velux loft conversions typically range from:
- £12,000 to £75,000+
- A small Velux conversion costing between £13,000 and £35,000
- Starting costs at £28,000 plus VAT depending on the number of windows and roof size.
Timeline Estimation
The timeline for a Velux loft conversion consists of distinct phases, including initial design, construction and structural work, first fix electrical and plumbing, and joinery and carpentry.
The loft conversion timeline typically includes the following phases:
- Initial design phase: 2-3 weeks
- Construction and structural work: 2-4 weeks
- First fix electrical and plumbing: 2-4 weeks
- Joinery and carpentry work, including fitting doors and windows: 3-6 weeks
Please note that these timeframes are approximate and can vary depending on the specific project.
Tips for a Successful Velux Loft Conversion
A few key points must be kept in mind to ensure a smooth and successful Velux loft conversion. This involves choosing the right contractor, maintaining effective communication, and setting realistic expectations.
Remember that, depending on the builder’s availability and location, a few months may pass before work begins on a Velux loft conversion. It’s, therefore, crucial to plan ahead and be prepared for this waiting period.
Choosing the Right Contractor
Choosing the right contractor is an essential step in ensuring the success of your Velux loft conversion. Reliable contractors are characterized by:
- Punctuality
- Quality workmanship
- Open communication
- Financial transparency
- Professionalism
Ensuring the contractor’s credentials are verified is crucial, which includes evaluating their licensure, insurance, relevant certifications, and compliance with local authority regulations. Contractors with a history of specializing in loft conversions and possessing a record of client satisfaction are better equipped to provide quality results in your Velux loft conversion project.
In addition, a professional contractor will offer a comprehensive contract that outlines the project scope, timelines, payment schedules, and procedures for managing changes, ensuring all parties have clear expectations.
Effective Communication
Maintaining clear communication with the contractor is critical for the success of your project. Clear communication ensures:
- Everyone is on the same page
- Reduces misunderstandings
- Helps address issues promptly
- Maintains the timeline of the loft conversion.
Effective communication for a loft conversion project involves regular updates from the contractor and responsiveness to homeowner queries. Unexpected challenges such as structural issues or adverse weather conditions can cause delays in the timeline, and clear communication is vital to managing these effectively.
Summary
In conclusion, Velux loft conversions offer a practical and cost-effective solution for homeowners who want to maximise their living space. Understanding the process, from assessing your roof’s suitability, choosing the right Velux window options, and complying with planning permission and building regulations to selecting the right contractor and maintaining effective communication, can ensure a smooth and successful conversion. With the right planning and execution, a Velux loft conversion can transform your loft into a bright, spacious, and comfortable living area, adding value and functionality to your home.
Key Takeaways
- Velux loft conversions are a cost-effective way to expand living space while minimizing disruption to the existing roof structure, offering benefits such as increased natural light, ventilation, and energy efficiency.
- The suitability of a Velux loft conversion depends on factors like roof pitch, structure integrity, and available space. The optimal pitch ranges from 35 to 53 degrees for window installation, and enough loft floor space is required for a usable room.
- Understanding the planning permission and building regulations is essential for Velux loft conversions, with certain window installations potentially requiring permission and compliance with standards for loft floor strengthening, fire escape routes, and energy efficiency.
Frequently Asked Questions
What is a Velux Loft Conversion?
A Velux loft conversion involves adding Velux windows to a sloping roof to convert the attic into a functional living space, such as a new bedroom or office.
Do I need planning permission for a Velux conversion?
You may not need planning permission for a Velux loft conversion, as it often involves adding windows to the existing roof structure. However, it could be required for properties in specific areas or if the roof is flat.
How much does a Velux loft conversion cost?
A Velux loft conversion can cost £28,000 and up plus VAT, but the total cost will depend on factors such as the number of windows required and the roof size.
What are the benefits of a Velux conversion?
A Velux conversion offers increased natural light, enhanced ventilation, added space, potential energy savings, and increased property value, making it a worthwhile investment for homeowners.
How long does a Velux loft conversion take?
A Velux loft conversion typically takes between 8 to 12 weeks to complete, providing a relatively efficient way to expand living space without major disruption.
